Monday, December 19, 2011

Secret Santa Stout: The labels

One last thing before we put a bow on Secret Santa Stout. It needs a label.

We had a funny idea to take a picture of me in a Santa costume, putting my finger to my lips in a "Shhhh..." gesture. We took the picture in front of the Christmas tree for extra effect. Then I bought a set of Avery shipping labels and we printed it out. Wasn't too difficult overall, although my wife did all the work. Maybe it was really hard, I don't know. That's why I outsource these things.

Anyway, that's the story of Secret Santa Stout. It's an excellent beer, and I'm happy to have been able to share it with you. That does it for this series of blog posts, but we'll be back whenever the next batch starts up.

Merry Christmas!

Wednesday, December 14, 2011

Secret Santa Stout: Tasting!


As it happened, my good friend Bob was over on the day that Secret Santa Stout was ready to taste. I chilled two bottles in the fridge for a couple of hours, and then poured them, as you see above. The carbonation was dead on.

I'll be straight with you: this beer is awesome.

It poured black, with a toasted brown colored head, and a cascading effect like that of Guinness. The first thing I noticed was a subtle but unmistakable scent of vanilla, giving way to a malty sweetness that was underlined, not overpowered, by the oaked bourbon. The finish was roasty and coffee-like. This beer has a decent amount of hops and no small amount of alcohol, but neither of those flavors stands out. It's all about the interplay of the malts, with the vanilla, oak, and bourbon flavors highlighting it all.

I'm very happy with how Secret Santa Stout turned out. This is a big step up from my first batch, which I credit equally to the recipe and to the experience that I had under my belt. My sanitation was more thorough this time around, no curveballs caught me unaware, and I had the patience to let the fermentation run its course. I'd still call myself a novice, for sure, but this has bolstered my confidence in a big way. I am already starting to think about what I'll do next.

But I have some unfinished business first. Since Secret Santa Stout is a Christmas gift, I can't just hand off some plain old bottles. I need to make labels!


Monday, December 12, 2011

Secret Santa Stout: Bottling


Bottling was so uneventful that I almost forgot to write about it! Which is not to say that nothing happened. It's just that bottling is a tedious process, with none of the joy and discover of the boil or the fermentation.

First, I boiled 3/4 cup of corn sugar in 1 pint of water, and let it cool to room temperature. I put this syrup in my cleaned and sanitized bottling bucket (which had doubled, earlier, as my primary fermenter). Then the anti-fun began. We siphoned the beer from the secondary fermenter into the bottling bucket. I have an auto-siphon, a nifty little device that aims to take the guesswork out of the process. It's easy: you stick it into your beer, pump the insert once or twice, and then watch it go. All you really have to do is keep track of the end of your siphon hose, making sure it stays in place and doesn't splash.

This worked pretty well (splashed a little), but it seemed to be taking even longer than usual. Eventually I noticed that a massive air bubble was stuck in the siphon hose. It was about a foot long, and a thin stream of beer was trying its damndest to circumnavigate it. I gave the auto-siphon another pump and the bubble cleared, which sped up the flow by about three times, but also splashed vigorously.

When you read about homebrewing, the importance of sanitation is the number-one thing they warn you about, but not a distant number two is the important of not aerating your beer after you pitch the yeast. Oxidation in your beer is the same chemical process as oxidation of metal, better known as rust. It's best to avoid that. So I was a little bummed at the splashing but it didn't seem bad.

Once the beer had been transferred to the bottling bucket and mixed with the sugar syrup, it was time to bottle. Here again I have an invaluable tool, a bottle filler, which attaches to the end of the siphon hose. It has a spring-loaded gadget at the end which holds the beer in the tube until you press it against the bottom of the bottle, at which time it gently starts the flow. As I learned, though, you need to start your siphoning with the bottle filler open, or else you build up a huge air bubble, which leads to more splashing.

Overall it went well. Due to technical difficulties, two of my bottles ended up being aerated pretty badly -- I marked those caps with an X. (The rest I marked "S3," on my wife's suggestion.) And I ended up with 47 full bottles and one about halfway full, which was just about the target yield -- and a far cry from the 8-Bit Ale, when I had to dump half the batch thanks to a snafu with my bottles.

Between sanitizing, bottling, and cleaning up, the entire process took about an hour and a half. Not bad at all, although, again, much less enjoyable than most of the other parts of the process. And it led to the worst part of all: waiting for the carbonation to be done. I would have to wait about two weeks to drink my first Secret Santa Stout.

Friday, December 9, 2011

Secret Santa Stout: Fermentation, stage 2

Here's what I don't think I understand about sanitization. Because I had never used my carboy before, I gave it a good overnight soaking in a bleach solution, and stuck my siphon tube in there for good measure. Of course, it wasn't full all the way to the top, and I only realized afterward that I probably should have done that. A good couple of inches of the glass were sitting there, unsanitized, and only made contact with the bleach solution with a little swirling and brushing. Now, I understand that the point of sanitizing your equipment is to reduce the number of potential contaminants to an insignificant level, and that it will never be 100%, but it seems to me like even reaching 90% is a lofty goal for the homebrewer.

No matter. Last time I was grabbing unsanitized equipment and plunging it straight into the wort, and everything came out all right.

At any rate, I sanitized my carboy, my stopper, my siphon hose, and my auto-siphon, and prepared to rack my beer. At this point I added the boubon-soaked oak chips and two vanilla beans, cut in half lengthwise. I had planned to put all of these things in a muslin bag so I wouldn't have to worry about filtering them out, but there was no way we could have fit it through the carboy's narrow opening. Instead, I added the wood chips and the beans loose. I am not too worried about the filtering process. My siphon has a small filter that wouldn't be able to hack very small particles, but won't have a problem with wood chips.

Rather than lug my primary upstairs, rack it in the kitchen, and then lug my secondary back downstairs, I decided to do it all in the basement. I brought in a small table and set my bucket on it. What's good about the bucket is how tightly it seals; what's bad about the bucket is how hard it is to unseal. Somehow, I ended up cracking the lid when I pulled it off. I'll need a new one for my next brew.

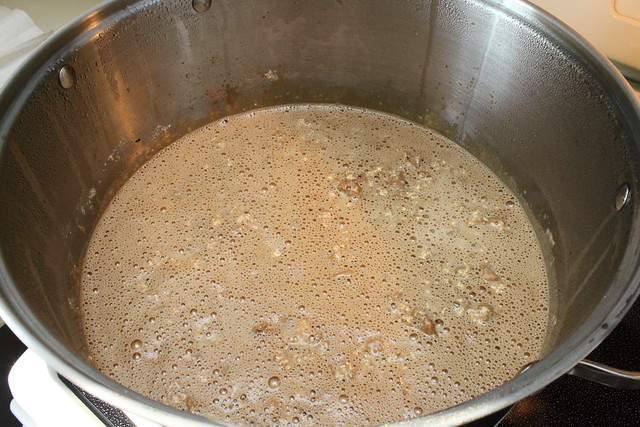
The brew looked as expected inside the bucket. There was a thick ring of cocoa-like krausen around the perimeter of the bucket a few inches about the surface of the liquid, but the fermenting beer itself looked calm, though cloudy. It smelled terrific -- sweet and coffee-like. It looked good, too, a glossy black color.

We siphoned it into the carboy without incident. There was a tiny bit of splashing at the end, when it ran dry inside the primary, but otherwise the process was quiet. A half-inch-thick layer of caramel-colored yeast sediment remained at the bottom of the bucket. That's always fun to clean out.

I also took a hydrometer reading, and found that the fermentation is mostly done. The starting gravity was 1.080, and at this stage measured 1.028. With a target gravity of 1.020-1.026, it was nearly there. But it needed time not only to ferment, but to steep in the wood and vanilla. I didn't want to oak it for too long -- I've read that can backfire -- so as soon as I got consistent hydrometer readings I planned to bottle it

More important, though, it tasted great! I was surprised. My 8-Bit Ale has tasted decent at the same point in the process, but this was delicious: already complex, roasty and malty, with a strongly alcoholic tang. I could only imagine what it would taste like with proper time to condition, let alone the new flavors I'd be introducing.

With a little over a month to go until Christmas, I was feeling good about the future of Secret Santa Stout.

Wednesday, December 7, 2011

Secret Santa Stout: Fermentation, stage 1

For my first homebrew, I did a single-stage fermentation. I am doing a two-stage fermentation this time, for a couple of reasons. One is that the recipe demands it: the second stage involves steeping some more ingredients in the beer. Another is that I'd like to give this brew a little more time to ferment, and I'd like to get it away from the yeast cake for that. Lastly, I have a whole carboy I've never used. Isn't that reason enough?

The first stage was expected to take 3-5 days, until the most vigorous fermentation had subsided and the krausen had fallen to the bottom of the bucket. After 24 hours, all was going well. The beer was bubbling away, belching a bubble through the fermentation lock every few seconds.

After 48 hours, this had happened:


Apparently I had a blow-out -- fortunately, a minor one.

Asking around on the internet, I found that this isn't a rare occurrence for a stout, because there are so many sugars for the yeasts to feast on. And it wasn't disastrous by any means, although I worried what it had done to the efficacy of the airlock. I had no choice but to rinse, sanitize, and hastily re-attach the lock. It was still bubbling away, so I hoped for the best. I was surprised that such a large bucket didn't have enough headroom for this beer, but it's a lesson learned. Next time I will use a blow-off tube.

The best part about this episode was realizing how much less stressed out I am this time around. Had this happened with my first batch, I would have sworn, stomped around the room, and possibly dumped it. This time, I just shrugged and figured I would roll with it. The more that I read about homebrewing, the more I get the impression that things mostly go right, even when they don't. You read a lot of experienced homebrewers who talk about the importance of doing everything right, and freely admit all the times they've done things wrong and lived to tell the tale.

Was the blow-out suboptimal? Sure. Was it a disaster? I'm betting not. It certainly wouldn't stop me from moving onto the second stage of fermentation.

Monday, December 5, 2011

Secret Santa Stout: Pitching the yeast

You may remember that in my first brew, I had an issue with my wort cooling down too fast, which other homebrewers on the internet told me was a problem they would kill to have. But it was odd all the same. My wort cooled to 58 degrees in a matter of minutes, which is sub-optimal for yeast, but ultimately not a problem.

Rather than doing anything different this time, I went with the assumption that I had, in fact, done something wrong the last time. I repeated the same steps, hoping for a different result, which I understand is the mark of sanity. (Did I get that wrong?) When the boil was done, I put the pot in a sink full of cool, but not cold, water, and stirred it occasionally to try to let more heat escape. The water in the sink heated up almost immediately, which was not a surprise but was fun all the same.


In the meantime, I added 3.5 gallons of cold water to my primary fermenter, a 7.8-gallon bucket. When the temperature of the wort was down to about 140 degrees, I poured it into the bucket as well and stirred both to aerate and to cool the mixture. Within a few minutes, I had a reading of about 75 degrees. Perfect. I also had a liquid yeast this time, instead of the dry yeast I had last time, so instead of activating it, I simply had to shake the vial and then dump it into the wort.

Next, it was time for the first specific gravity reading. I have trouble with this, because the liquid in the flask is always frothy, and I can't see the line on the hydrometer. After a few minutes, we ascertained an initial reading of 1.076, at 72-degrees. That equates roughly to a reading of 1.080 at 60 degrees, which is what the hydrometer is keyed to, and dead on target for the recipe. If you recall how all this went the last time, you'll agree that things were going much more smoothly for Santa.

I closed the lid on the bucket, attached a fermentation lock, and set it in the basement. Nothing to do but sit back and let those yeasts do their work. And if you're thinking that all of this seems a little too good to be true -- you're right!

Friday, December 2, 2011

Secret Santa Stout: The boil

Let me say first that having a successful brew under my belt made a huge difference in my attitude toward the second one. When I started brewing 8-Bit Ale, I was so keyed up that I couldn't even focus. I don't know why; it's just how I am. I was so desperate for everything to go right that I was ensuring that it wouldn't. Having had that experience, I approached Secret Santa Stout with a comparatively Buddha-like calmness.

This recipe doesn't ask for anything more advanced, technique-wise, than the last one. It just has a lot more ingredients. The whole thing starts with the steeping of some grains. The included grains -- chocolate malt, Munich malt, and roasted barley -- needed to be cracked before use. I poured them, little by little, into a large plastic freezer bag, and then attacked them with a rolling pin. Charlie Papazian recommends not pulverizing the grains. You're just looking to breach the husks. It was hard to tell how I did on this score, because there were plenty of fine particles left over, but no reason to sweat it.

When all of them were cracked, I tied them into a (very heavy) muslin bag. I poured the flaked oats into another muslin bag and tied it off. Then I filled my brew pot with two gallons of water and added the grains. I turned on the heat, and brought it up to temperature. I never did replace the broken thermometer from the last time, so I'm still using a meat thermometer to measure the temperature of my water. I'm not sure how accurate the reading is, since it only goes a few inches into the water, but I tried to stir the water around the bags occasionally in order to evenly distribute the water. When the reading reached 150 degrees F, I turned off the heat, covered the pot, and steeped for 30 minutes.


After that, I was supposed to add the malt extracts and the Galena hops, but we realized we needed some things at the grocery store -- in particular, a replacement thermometer. See, our digital thermometer went bonkers, giving readings in both Fahrenheit and Celsius, and refusing to turn off. In attempting to open up the battery compartment, we ended up breaking the whole thing. So it was off to the store. I removed the grains from the pot first, but let the tea sit on the stove, covered, for another 30 minutes or so until we got back.

At that point, I added the malt and the boiling hops. Unlike last time, I used a dry malt extract instead of a syrup. Dry was definitely easier to work with, since I didn't have all the prep work of soaking it in hot water and then spooning it out. But it did form big, sticky clumps in the water that took a few minutes of heating to dissolve. I have no idea how dry extracts compare to syrups in terms of the finished product, but as a lazy homebrewer I will say that I definitely prefer the powdered version.


As before, I'm using pre-measured hop pellets, not whole hops. Not much to say there. You just cut open the plastic package and dump them in. Couldn't be easier. After boiling with the Galena hops for 45 minutes, I added the Golding hops for the final 15 minutes. Although I chose this recipe for its maltiness, I was surprised to realize that it's actually much hoppier than the amber ale I brewed last winter. Doubly so, in fact -- 3 ounces, compared to 1.5! That's part of the reason I'm so excited about the recipe. There's a lot more going on.

After an uneventful boil, the step was one that had caused me much frustration the last time: cooling the wort and pitching the yeast. Would I have learned my lesson?